Publishing Your Maven Project to Bintray
UPDATE: As of May 1, 2021 Bintray services will no longer be available (ConanCenter and JCenter are not affected) for more information read the Centers Deprecation Blog
Bintray gives you everything you need to share your Maven project, and much more: you will be able to monitor downloads and users with the statistics that Bintray keeps for you. You can also share your project via Bintray’s JCenter repository (which is the largest public Maven repository out there), and effortlessly sync it with Maven Central, if you wish.
Just follow these 5 simple steps to upload your Maven project to Bintray:
1. Have your Maven project ready
- For this use case we will assume we have a maven project with the following groupId: org.jfrog.example.bintray.maven
2. Create a Maven package in Bintray
- Open a Bintray account if you have not done so before.
- Use the default Maven repository under your account or create a new one. The is where your Maven files will be hosted.
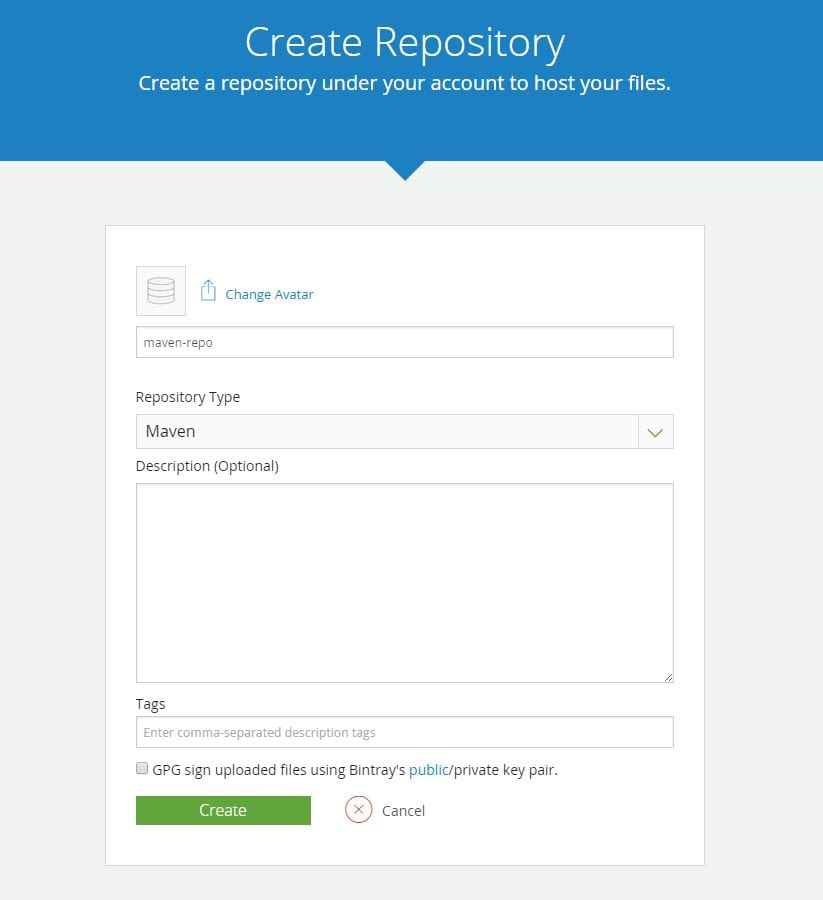
- Under the Maven repository create a new package for your project. The package is merely a logical container that holds metadata about your project and annotates your files to allow Bintray to collect package and version level statistics.
A good name for your package would be your main artifactId, but any name that logically identifies your project will do just as well.
In our case, a good example would be: maven-example
3. Add the Bintray distribution URL
Next thing you need to do is to add a distribution section to your project’s pom.xml, and specify the URL from which to distribute your project. We will use our Bintray Maven repository and package as the target for deployment (remember? files in Bintray are always associated with a logical software package).
<distributionManagement>
  <repository>
      <id>bintray-repo-maven-example</id>
      <url>https://api.bintray.com/maven/tamarjfrog/maven-repo/maven-example/;publish=1</url>
  </repository>
</distributionManagement>
For your project to be visible to others, Bintray requires that you publish it. One way to do that is to add the publish directive to the distribution URL as a matrix parameter (;publish=1) as I did in the above example. You can also publish your projects at a later time using the Bintray UI or via REST.
This block also includes an <id> tag. The id can be any string, but it should match the id in the settings.xml file described in the next step.
4. Provide your credentials to Bintray
In order to work with Bintray you need to provide your Bintray username and API Key as upload credentials in the username and password tags of your Maven settings.xml file. The API Key can be found when editing your Bintray profile page.
<server>
  <id>bintray-repo-maven-example</id>
  <username>tamarjfrog</username>
  <password>***my-top-secret-api-key***</password>
</server>
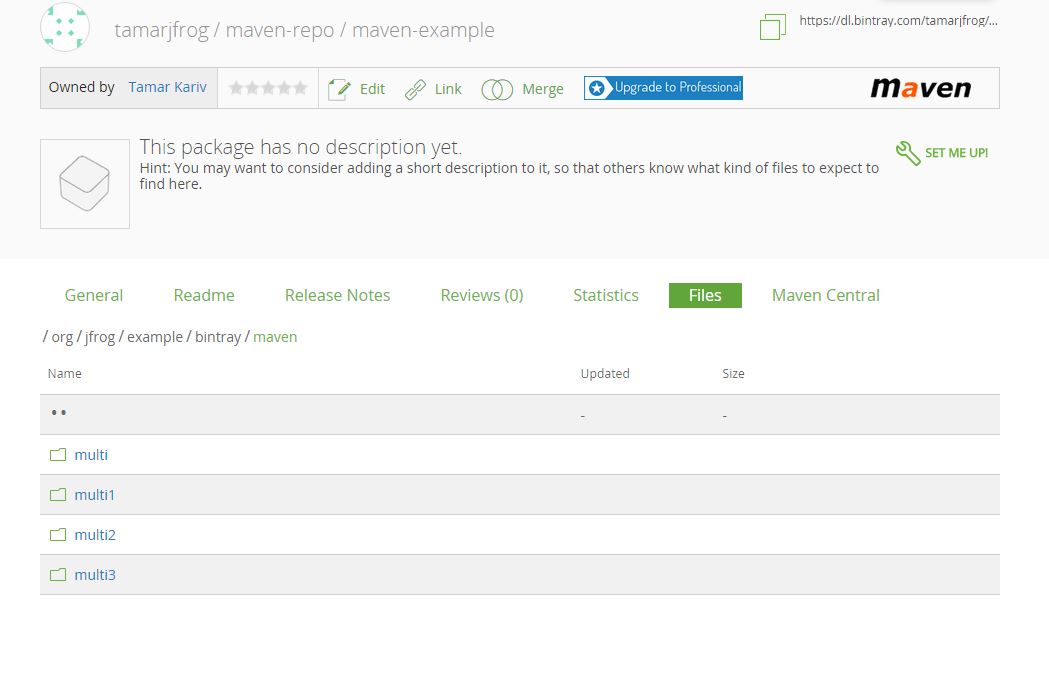
5. Time to deploy!
You are almost there. This is the time to run
mvn deploy
The project will be built, uploaded to the the Bintray repository target URL you provided, and published. You can now see your files in your Maven package in Bintray.
At this point, you can add your project to JCenter, the most comprehensive public Maven repository, so your project is well exposed. To read more about that, stay tuned for my next post.
A sample project similar to what I used in this post can be found in GitHub: bintray-examples/maven-examples.
Good Luck!


